Working with Ansible Dynamic Inventory using AWS

Maintaining the inventory file while working with Ansible with AWS can be a difficult process owing to frequent changes in dynamic components of the infrastructure.
Fortunately, there is a convenient solution called Ansible Dynamic Inventory. Dynamic inventory is an Ansible plugin that utilizes API calls to AWS to retrieve instance information during runtime. This approach provides you with the ability to manage the AWS infrastructure dynamically by obtaining up-to-date details of EC2 instances.
By leveraging dynamic inventory, you can automate the process of discovering and managing your AWS resources without the need for manually updating the inventory file. Instead, Ansible interacts directly with the AWS API to obtain the necessary information, allowing for more flexibility and ease of management.
In this tutorial, you will learn how to configure dynamic inventory on AWS using the AWS ec2 Ansible plugin.
Prerequisites
Ansible Installed
Python3, Pip3 and Boto3
AWS Account
SSH key pair
EC2 Instances (preferably 2 or more) tagged
Create a Custom Inventory File
Ansible generates an inventory file, which is usually stored in /etc/ansible/hosts. During a playbook or command execution, Ansible uses this as the default location if a custom inventory file is not specified with the -i option.
To get started, access your home folder and create a new directory to hold your Ansible files:
cd ~
mkdir ansible
- Move to that directory and open a new inventory file using your text editor of choice. Here, we’ll use
vim:
cd ansible
vim aws_ec2.yaml
- Copy the following configuration to the file. If your Ansible controller is not in AWS, authentication is handled by either specifying your access and secret key as ENV variables or inventory plugin arguments
plugin: amazon.aws.aws_ec2
# The access key for your AWS account.
aws_access_key: <YOUR-AWS-ACCESS-KEY-HERE>
# The secret access key for your AWS account.
aws_secret_key: <YOUR-AWS-SECRET-KEY-HERE>

regions:
  - us-east-1

filters:
    instance-state-name: running

keyed_groups:
  - key: tags
    prefix: tag
  - prefix: instance_type
    key: instance_type
  - key: placement.region
    prefix: aws_region
  - prefix: az
    key: placement.availability_zone
Warning: Do not commit this file to a public git repository
For ENV:
export AWS_ACCESS_KEY_ID='YOUR_AWS_ACCESS_KEY_ID'
export AWS_SECRET_ACCESS_KEY='YOUR_AWS_SECRET_ACCESS_KEY'
Edit Ansible.cfg file
sudo vim /etc/ansible/ansible.cfg
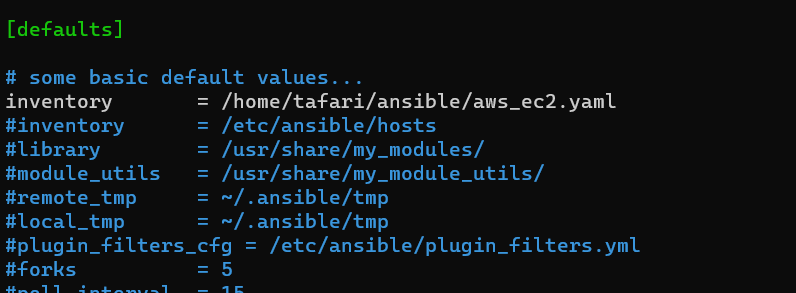
- Navigate to the
[defaults]section of the file and change the inventory parameter value
inventory = /home/<USERNAME>/ansible/aws_ec2.yaml
- Navigate to the
[inventory]section of the file and change the plugin's parameter value. The following line is to enable the ec2 plugin.
enable_plugins = aws_ec2

Execute the following command to see the listings of the ec2 instances.
ansible-inventory --list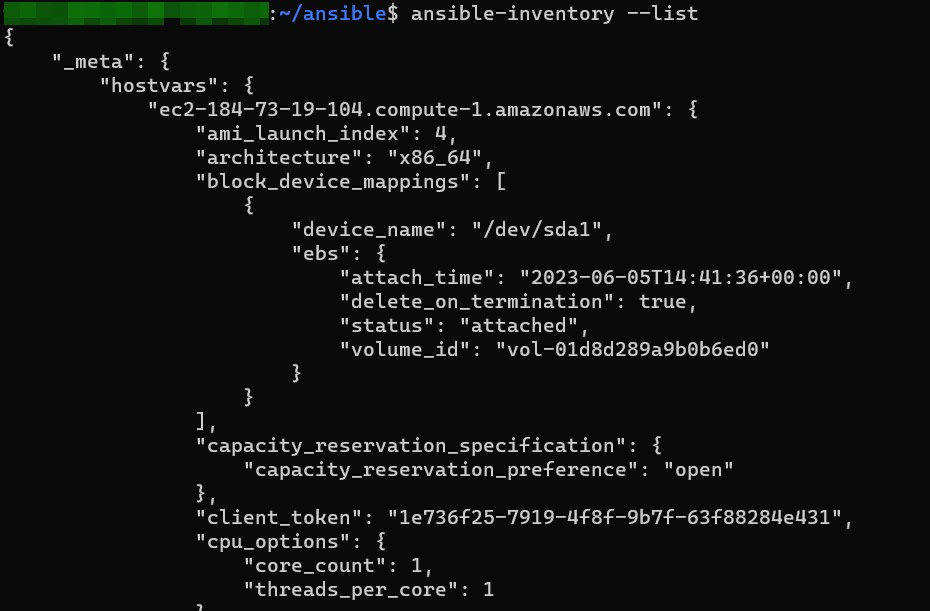
EC2 Instance Grouping
Tags, instance types, instance names, custom filters, and other criteria can be used to organize instances. View all supported filters and keyed groups from this page.
The example below of keyed_groups:
keyed_groups:
  - key: tags
    prefix: tag
  - prefix: instance_type
    key: instance_type
  - key: placement.region
    prefix: aws_region
  - prefix: az
    key: placement.availability_zone
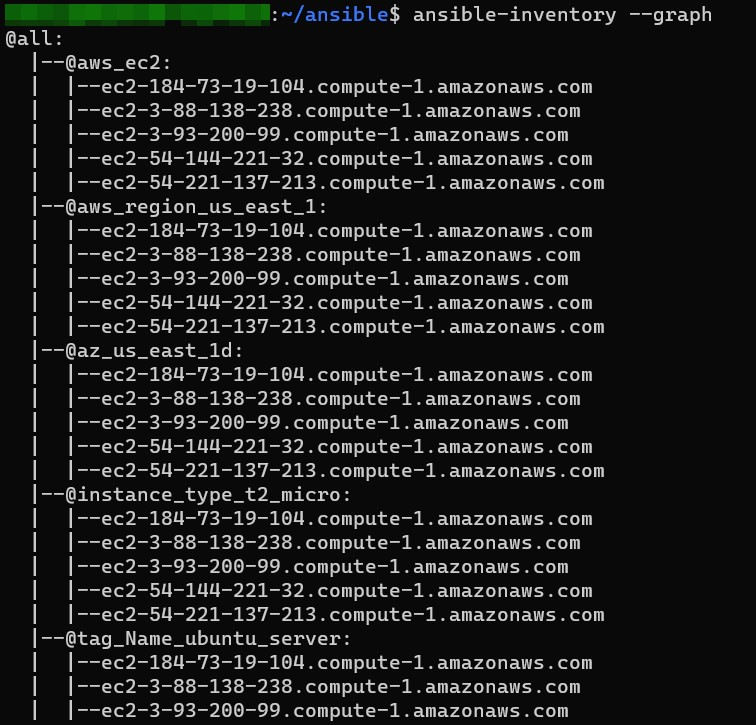
Execute the following command to list the ec2 dynamic inventory groups.
ansible-inventory --graph
Instances will be grouped under the tags aws_ec2, aws_region_us_east_1, az_us_east_1d , instanace_type_t2_micro and tag_Name_ubuntu_server .
Using Dynamic Inventory Inside Playbook
If I want to execute an Ansible playbook on all of the servers tagged ubuntu_server. The sample playbook is shown below. It uses the apt module to install Nginx on all the Ubuntu servers.
Create an ansible-playbook named
ec2-playbook.yaml.For Debian and Ubuntu instances use:
- name: Playbook Example
  gather_facts: false
  hosts: tag_Name_ubuntu_server
  tasks:
    - name: Install the package Nginx
      ansible.builtin.apt:
        name: nginx
        state: present
For CentOS, Amazon Linux2 and Amazon Linux instances use:
- name: Playbook Example
  gather_facts: false
  hosts: tag_Name_ubuntu_server
  tasks:
    - name: Install the package Nginx
      ansible.builtin.yum:
        name: nginx
        state: present
Execute the playbook with the following command:
ansible-playbook ec2-playbook.yaml -u <ec2-instance-username> –-private-key=<keyfilename.pem>
Get the default username for the AMI that you used to launch your instance:
| AMI used to launch an instance | Default username |
| Amazon Linux2 and Amazon Linux | ec2-user |
| CentOS | centos or ec2-user |
| Debian | admin |
| Ubuntu | ubuntu |
The image below shows Nginx has been successfully installed on the Ubuntu servers.